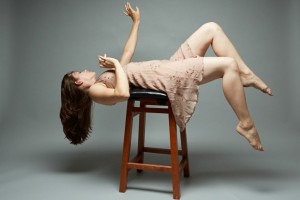
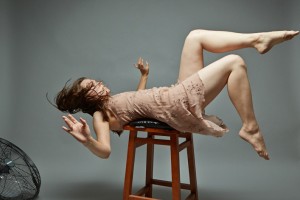
I’ve been interested in photographic special effects since I was a kid, but levitation photography is one of the things that has, up until now, remained on my list of things to try. After doing some research online, it seems as though the three most popular methods for achieving the levitation effect are:
- Capturing the subject while jumping
- Having the subject resting on something, then Photoshopping out the support
- Suspending the subject by rope or wires, then editing out the rope or wires
Jumping was out – for the idea I had in mind, it would’ve been far too difficult for the model and I figured the chances of getting the shot I wanted within a reasonable time frame were slim. Suspension seems to be a good option when the subject is clothed, but I decided that a simple base support would be the best solution for this first try. With both the support and suspension methods, it’s easiest to take two shots, one with the subject in the frame and one without, then editing out the support to give the illusion of floating.
First, the support. I used a short bar stool for the main support, adding a cushion to the seat to make it more comfortable for the model:

When the model showed up, we spent some time trying out the bar stool, making sure it was comfortable and seeing how hard it would be for her to hold her position. We did some test shots, then we were ready to begin. For lighting, I opted for a single large strip light, above and just slightly in front of her. After about a dozen shots, I realized that although everything seemed to be working, we were lacking a dynamic element: I could get her to look like she was floating, but the images we were getting were otherwise pretty static. She was doing everything right – something was just missing.

Time to bring out the big fan and get some windage going. Shooting tethered to a computer, we were able to immediately see that we were getting what we wanted and picked one of the last images as the one that I would work with. Then, we shot about a dozen more shots with her legs and arms in varying positions, just in case I needed body parts later in post-production. Finally, I took a shot of just the backdrop, to simplify editing later:


After the model left, I went to work on editing the image. The first step was to do an assessment of what I didn’t like about the image, visualizing the image with the stool out of the shot:

What I really liked about the shot was her expression and her hand positions. I also loved the way her dress fell just right, and I could see no problem editing out the stool using a layer mask in Photoshop. What I didn’t like was the flat area where the fan blew the hair up against her neck, the small bit of hair behind her shoulder, and the abrupt angle of her leg. Also, I thought I might have problems with the shoulder area looking right after I removed the stool. I went back through the photos from the shoot and found and image that would be a good filler for the hair, one for the back of the shoulder, and one for the leg. The following image shows approximately where the filler pieces were placed before masking out the parts I didn’t need:

With all the parts in place, I then masked out the bar stool, showing the bare backdrop behind the subject. Then, I painted in the shadow in the areas where the bar stool legs had been. Finally, I adjusted the tones and colors to give the image the feel that I wanted – almost like she was floating in water. Here’s the final edited image:

Special thanks to Julia for being my subject for this project.


Very helpful Information and Keep Sharing More.