Typography and color transparency with the Kirki toolkit
Now we get into what I think are two of the most powerful and useful tools in the Kirki toolkit: Typography and color controls. Whether creating a new theme or modifying an existing one, changing colors and font characteristics can be a real pain in the neck. As the Kirki website puts it:
Kirki’s color control extends WordPress Core’s color control, allowing you to select not only HEX colors but also RGBA colors.
and
The
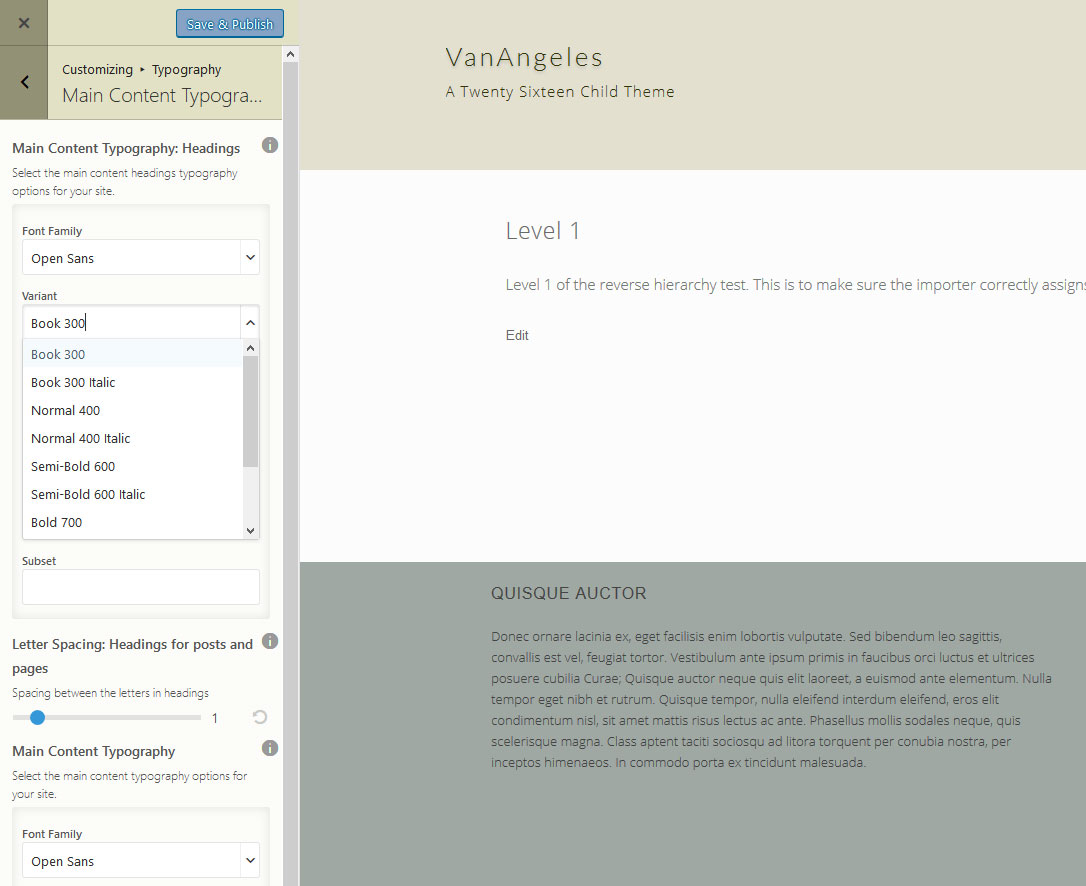
typographyfield allows you to add the most important typography-related controls in a single, compact view. It shows the following controls:
- font-family
- variant
- subsets
- font-size
- line-height
- letter-spacing
- color
- text-align
- text-transform
The typography control uses Google fonts, making the styling possibilities seem nearly endless.
Setting up any of the available Kirki controls is fairly simple. You can set up a new panel or use an existing one. In my case I wanted one panel dedicated to Typography and one for Colors. Remember, I removed the existing WordPress customizer Colors panel in anticipation of building it from scratch for Kirki color controls. Here’s an example of the code used to add the Color and Typography panels in kirki-customizer.php:
function va_panels_sections( $wp_customize ) {
	//__Set up the Panel and Sections__//
	$wp_customize->add_panel( 'colors', array(
		'priority'    => 50,
		'title'       => __( 'Colors', 'vanangeles' ),
		'description' => __( 'Color settings for the website', 'vanangeles' ),
	) );
//
	$wp_customize->add_panel( 'typography', array(
		'priority'        => 50,
		'capability'      => 'edit_theme_options',
		'theme_supports'  => '',
		'title'           => __( 'Typography', 'vanangeles' ),
		'description'     => __( 'Typography options for the website.', 'vanangeles' ),
	) );
	add_action( 'customize_register', 'va_panels_sections' );
Then a typography section can be added within the same function:
	$wp_customize->add_section( 'headings_typography', array(
		'title'      => esc_attr__( 'Headings Typography', 'vanangeles' ),
		'priority'   => 10,
		'capability' => 'edit_theme_options',
		'panel'      => 'typography',
    		) );
Once the panel and section have been set up, the settings and controls can be added in a separate function:
function va_customizer_fields( $fields ) {
	//__ Add the header-typography control__//
	$fields[] = array(
		'type'        => 'typography',
		'settings'    => 'headings_typography',
		'label'       => esc_attr__( 'Headings Typography', 'vanangeles' ),
		'description' => esc_attr__( 'Select the typography options for all headings, including your site title and description.', 'vanangeles' ),
		'help'        => esc_attr__( 'The typography options you set here will override the Main Content Typography options for all headers on your site (post titles, widget titles etc).', 'vanangeles' ),
		'section'     => 'headings_typography',
		'priority'    => 10,
		'default'     => array(
			'font-family'    => 'Lato',
			'variant'        => '300',
			'font-size'      => '26px',
			'line-height'    => '1.5',
			'text-transform' => 'capitalize',
			//'letter-spacing' => '3',
			//'color'          => '#686868',
		),
		'output' => array(
			array(
				'element' => '.site-branding .site-title  a'
			),
		),
	);

	return $fields;
	}
	add_filter( 'kirki/fields', 'va_customizer_fields' );
You can see that I commented out the options for letter spacing and color. The letter spacing is handled by another control (a slider control, added separately) and the color is controlled in the Color Panel. Notice that the 'section' in the typography control points to 'headings_typography', which is the earlier named section. Similarly, in the headings_typography section 'panel' refers to 'typography', the name of the panel set up just before the section. At the end of the function, all of the fields return as a minified set of inline styles in the section of the web page.
Here’s what one of the controls looks like after being added to the customizer: