I’ve been shooting tethered in my studio sessions for a couple of years now and love having the ability to see the images almost immediately as they’re shot. Whether for portraits or figure shoots, having the ability to visually communicate and direct changes is a huge asset, saving time and assuring that the final images meet our expectations. But now, I’m faced with having to re-think how I’m going to do things…
I’m currently using the following setup for most of my studio shoots:
- Camera: Canon EOS 5D Mk III
- Computer: iMac (mid-2011), 16GB RAM
- OS: OS X Sierra
- Connection: 15 ft. USB A to Mini B cable
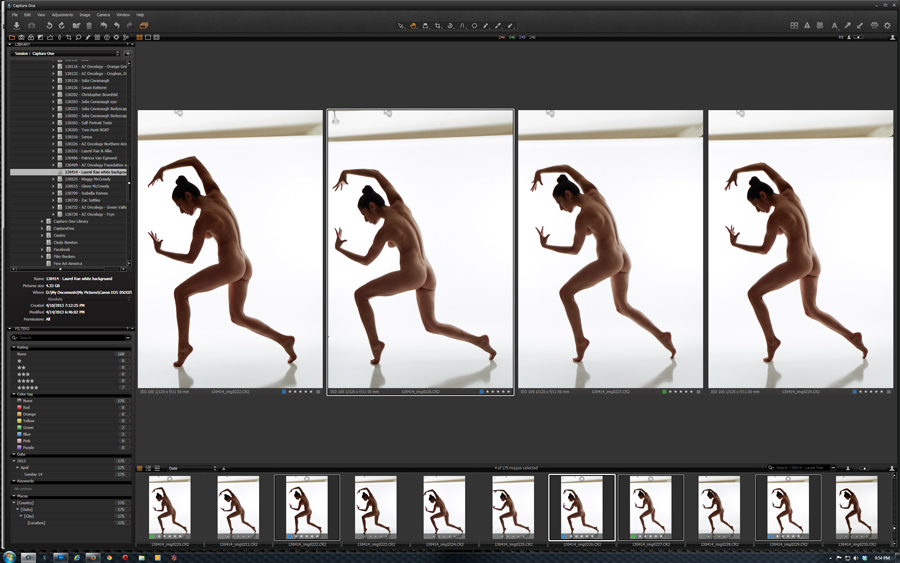
- Software: Capture One Pro (v9.2)
What got me here
The setup works great, and RAW images are transferred and visible in Capture One within a couple of seconds from the time they’re shot. The problem is, I’m a klutz and have a habit of tripping over the cable during shoots. As a result, I’m on my third cable after damaging the small end of the first two cables. I’m also beginning to have periodic connection issues and I question whether I may have damaged the camera’s USB port (although I prefer to blame Apple for the issues, since restarting the iMac generally resolves the problem). Until the port fails completely I’d rather not have to send my main camera in to Canon for repairs, which means I had to start thinking about alternatives to my current methods. The options I came up with included:
- Abandoning the direct connection and periodically transferring the images from the camera via a card reader. Advantages: No down time and no cost. Disadvantage: Losing all of the benefits of real-time viewing that tethered shooting provides
- Using Canon’s Wireless File Transmitter WFT-E7. Disadvantages: Bulky, ridiculously expensive, and not an option if the camera port is bad since the transmitter relies on a USB cable connection to the camera.
- WiFi SD card. I’ve never looked into these in detail, so the advantages and disadvantages were largely unknown quantities for me. However, the obvious advantage to me would be not having to worry about cables and a most likely disadvantage would be transfer speed.
- Canon now has an SD card-shaped WiFi accessory, the Wireless File Transmitter WFT-E7. Unfortunately, as of this writing the accessory is only compatible with the EOS 7D Mark II, EOS 5DS and EOS 5DS R cameras
Of these options, a WiFi SD card seemed at least worth further looking into.  I started by looking into the Eye-Fi – a WiFi SD card that’s been around for about a dozen years and probably the most familiar name in WiFi SD cards. It’s unclear to me what’s happening with Eye-Fi though – clicking on the Shop Now button on the Eye-Fi website took me to an Amazon link featuring the Toshiba 32GB FlashAir III Wireless SD Memory Card. In comparing the two I picked up enough information for me to question the direction in which Eye-Fi is heading and whether the Eye-Fi card was a good idea in the long run, so I thought I’d give the Toshiba FlashAir a try. I figured for $45, the worst that could happen is that I’d end up with an extra 32GB SD card.
Getting it to work (the way I need it to)
Here’s what I need to be able to do: Take a photo with my camera, then immediately be able to review the photo in Capture One on my computer. When the next photo is taken, it becomes the next one to appear in the Capture One viewer. Wirelessly.
I knew it wouldn’t be easy; the FlashAir seems to be famous for its lack of documentation, and what it does have is virtually worthless. It took me about a half a day and a lot of experimentation, but here’s how I got it to work.
NOTE: These steps are specific to my shooting setup (iMac, running OS X Sierra) but it may make things easier for someone else whose goal is the same. I have not yet tested the FlashAir on my PC workstation.:
Toshiba FlashAir Tool (v3.0.2 for Mac)
Needed for basic functionality of the card. Normally, files must be manually copied from the card to the computer – the process is not automatic.
- Check the FlashAir W-03 compatibility list: https://www.toshiba.co.jp/p-media/wwsite/compati/pdf/flashair_w3.pdf
- Download FlashAir Configuration Software: https://www.toshiba.co.jp/p-media/english/download/wl/software02.htm
- Install FlashAir Tool from the above download.
- Insert FlashAir SD card into computer SD slot. I spent about a half hour trying to run the FlashAir Tool (next step) while the card was in my camera before I figured this out.
- Run the FlashAir Tool.

Go to FlashAir Drive Setting and follow the instructions.

When prompted, remove the SD card from the computer and insert it into camera.
Turn on the camera, follow the instructions and wait for the configuration process to finish.

- When the Drive Settings are complete, select flashair from the Mac Wi-Fi networks. Note: As far as I can tell, it’s not possible to simultaneously access the FlashAir card and connect to the internet via a WiFi connection. Switching between the two is pretty quick, but it’s either one or the other.
Sync App (Mac)
This is one of several apps available at the FlashAir Developers website which allow syncing between the SD card and the computer.
- Download and install FlashAirSync by Anastasiy Safari: http://blog.safari.am/?p=890
- Run the FlashAirSync app.
- Select Settings from the FlashAirSync menu in the desktop toolbar at the top of the screen.
- Select the folder on the SD card to sync from.

- Create and/or select the folder on the computer to sync to.
- Click on Start.
Capture One Pro (v9.2 for Mac)
These are the settings I used to be able to view the images immediately, as they were shot.
- Menu > Preferences/Image – Enable JPEG editing
- Menu > Camera – Hot Folder Enabled (checked).
- Menu > Camera – Auto Select New Capture: Immediately
- Set the (computer) sync folder (from the Sync App section) as the Capture Folder.
Camera (Canon EOS 5D Mk III)
- Record function/card selection > Record Separately
- Choose RAW format for CF card (card 1). RAW Images are recorded to the CF card but not synced with the computer and must therefore be transferred manually via a card reader when the card is full or upon completion of the shoot.
- Choose L (large or medium jpg) for SD card (card 2). These are the images that are syncing in real time with the computer and are being viewed in Capture One.
- Choose card 2 (SD card) for playback.
- Set Auto Power Off to at least 15 minutes. This keeps the camera from powering down too frequently and therefore killing the connection to the computer. Some users of the FlashAir said they experienced more battery use with the card in general, but I tried it at this setting and didn’t notice a significant drain on the battery.
Using this setup, the RAW files are recorded to the CF card and large JPGs are recorded to the WiFi SD card. The JPGs are synced with the computer as soon as they are recorded to the SD card and then are immediately available for viewing in Capture One. Any adjustments made to images in Capture One during the shoot are being made to the JPGs copied from the SD card – not to the RAW images.
Reminder: The RAW files recorded to the CF card still have to be transferred to your primary device manually via a card reader.
By itself the FlashAir card allows you to copy files from your camera to another device, including an iPhone or Android phone (by way of an app), or a Mac or a Windows PC (by way a web browser). However, the process is not automatic – transferring the files requires a refresh of the app or the browser. Thanks to the simple tool created by Anastasiy Safari, the process becomes automatic and does not require the use of a browser. Hopefully, Toshiba will think about providing the same functionality as an option for their own software.
Important note from the FlashAir FAQ:
“If you format the FlashAir card using a computer (not the FlashAir utility) or using a devices formatting ability, the software required to communicate wirelessly will be removed from the card and it will become a normal SD memory card. To restore the card back with the ability to communicate wirelessly, perform the following steps:
NOTE: This procedure will erase all files currently save to the card and reinstall the software necessary to communicate wirelessly.
Connect the FlashAir card to your computer.
Save any files you want to keep to your computer from the FlashAir card.
Open the FlashAir utility.
Select the “Format the card” tab.
Click the “Format” button.The FlashAir card will be formatted and the necessary software will be reinstalled. However, the FlashAir utility will NOT be installed onto the card as it was when the card was new.”
The safest way to remove images from the card – without compromising the FlashAir software – would be to close the FlashAirSync app, insert the card into the computer’s card reader, open the image folder in Finder, and delete the files manually.


I found this walk through really helpful Galen, Thank you.
The FlashAirSync link was particularly appreciated.
I found the Flashair gets easier to use the more you use it 😉
Dave.
I have tried to get this to work in my 5D mark iii and I only get an error when I insert it into the camera that it is not accessible and to format the card. I actually tried that and the camera won’t even format it. I have tried to find something about it and I can’t. It is the w-04 version and the mark iii is listed as compatible. Do you have any advice?
Cathy,
You definitely don’t want to format the card as it contains the software required to communicate with the computer (see the note near the end of the article). Did you first run the FlashAir Tool from the computer with the card in the computer SD slot? The FlashAir Tool must be run first in order for the card to be configured for use with the camera.
Galen
Thanks for the invaluable info.
Am running into a glitch with high sierra.
If i click the shutter button for some reason the flash sync disconnects from the flashier and it does not transfer the image to the destination folder. every thing else is working, sync to my i pad is perfect sync to my mac directly using http://flashair on safari is great, i have to click the flash sync each time to make it sync and transfer because it always disconnects?
Zuhair,
This is what happens when the process works, as I understand it:
– You press the shutter, the camera records to the FlashAir card.
– The FlashAir card also acts as a WiFi connected device.
– Flash Sync continually polls the card to see if new images have been added.
– If Flash Sync sees new images added, it copies the new images via WiFi from the FlashAir card to the Mac.
So, I can’t think of any reason why simply pressing the shutter would interfere with communication between the FlashAir card and the Mac. You’re using an EOS 5D Mk III and some variety of Mac?
Galen
Am using MacBook pro.
High Sierra
Nikon d610 with the toshiba flash air w-03.
It is really puzzling why i have to click on the flash sync app in the menu bar in order to connect and sync.
The moment i click on the shutter it disconnects from the flash air but yet every thing is working as far safari logged to http://flashair and my i pad seeing the new photos.
The moment i click on the flash sync icon it connects and transmits everything to the desktop folder.
the moment i click on the shutter button it disconnects and nothing happens in the destination folder yet every thing else flows smoothly???
Zuhair,
Strange. Have you tried using the Safari method on your MacBook? I haven’t tried that method since Flash Sync has worked for me, but it might be worth a try.
Galen
Zuhair,
Also, did you read the FlashAir compatibility notes specific to your camera? Looking at the notes pertaining to the D610, I see the following:
“*3: From “Menu” of the camera, choose “Custom Settings ” > “Monitor off delay”. Set all the times to the maximum or no limit. Also, from “Custom Settings”, choose “Standby timer” and set the time to the maximum.”
and
“*4: To use a FlashAir™ in the Manual startup mode, make the following settings on the camera: Choose “Playback” > “Playback Folder” > “All”. This will allow the wireless LAN startup image, the default image file in the FlashAir™, (“DCIM”> “100__TSB” > “FA000001.JPG”) to display on the camera. For more information, see the User Manual of the camera.”
Galen
Thanks Glen,
It is done actually.
Flashair works and no issues, it is the flash sync that is not.
I think he will need to update his software for high sierra. it could be some compatibility with that. i will keep searching and if any updates i will post here.
Galen,
Am very happy to report that It is working just fine with high sierra, i reinstalled it and everything is working like charm.
Just try to keep the destination folder in picture folder, i put it in desktop and seems it has to do with the level of security of high sierra that it was acting weird or something but IT WORKS.
Hi,
This is brilliant, thanks for the tutorial. Is there a way to have a style automatically applied to the picture like when doing traditional cable tethering?
Thanks
Flo
Flo,
I haven’t tested it, but I don’t see why it wouldn’t work the same way. According to the Capture One Blog:
The difference might be whether Capture One interprets images from the FlashAir card as imports or as captures (or as neither).
Galen
Galen, thank you so much for this article. Can you use this card with Lightroom instead of Capture one?
I don’t use Lightroom, so I really don’t know.
Galen
Hi Galen,
Thank you for the elaborate explanation.
One thing wasn’t clear – when you shooting with raw ( and canon mark 3), you’re using one card for jpg and another card for raw?
I would like to use it in a professional photoshoot and im using raw naturally.
tnx
yael
Yael,
Correct. I use the CF card for RAW and the FlashAir card for jpg. The jpgs are sent to Capture One for immediate viewing and I transfer the images from the CF card post-shoot using a card reader. This is a speed issue – saving the images as RAW on the FlashAir card makes for unacceptably slow transfers to the computer and jpgs give me enough information to see what I need during the shoot
Galen
RAW transfer IS possible, right? My compressed RAW is 12MB, so I believe it would transfer in less than a minute
It’s absolutely possible to transfer RAW files – I chose not to because of the speed issue. I found it impractical to wait for 30 seconds or more between shots during something like a portrait session, in which I want immediate input.
I’ve had a Transcend card for years but never managed to get it to work with Lightroom. I finally gave up and bought a flashair a couple of weeks ago. It took a bit of perseverance, but I eventually managed to get it to work with my NEX-7 and Lightrooom using Frank Eberle’s add-in. I’ve found it’s a bit temperamental, sometimes not loading for a minute or more and then pulling all shots in. But I suspect that’s because the camera body is mostly metal and impedes the signal, and the JPG previews are quite large so not ideal for rapid transfer. But when it’s working well I can get an image on screen in a few seconds and it;s great to have that ability.
Well worth trying.
Thanks for the input, Kevin.
Unfortunately can’t get it to work on my Mac-mini w/ High Sierra. Take a shot and the Flash Sync addon will close. Reopen flash sync and it will sync all the images to the target folder. Take another shot, it will close down again. Rinse repeat. Each time I reopen it it, it resends every image from card to the target folder, so I end up with multiple copies of everything in the folder. :-/
Thanks for the walk through.
But I’m having problem with the flash sync software with my Leica MM which there’s no way to tether besides with the wifi sd card.
Everytime I press the shutter, flash sync will automatically quit. I’m using High Sierra.
I saw someone has the same issue before but he was using the Nikon rather than a stupid Leica.
Yes, it is stupid with such a high price. All I paid for was only the image quality, no color, no tethering, no everything…….. Sorry about the complain tho.
Hope you could help me on this.
Thanks & Happy Holiday
– is there something similar for windows? Can’t afford a Mac right now 🙁
– Can you force the card connect to the router’s existing WiFi ? (as a client) so it is accessible from all devices in LAN?
1) For me, the problem and this solution was a result of trying to use a Mac. Dumped the Mac and went back to Windows and I’m able to do cabled tethering properly (with a bit of cable management and more caution on my part).
2) I don’t think that’s how the FlashAir is designed, but I could be wrong. It appears as an independent WiFi source, so it’s possible that all devices could see it, but not on the existing network.
i need a way to use android with flashair over network , so the card will be connected to a router with a fixed IP and i need my android tablet to connect to the video files on card , is there a way for this?