I’ll admit it: When it comes to photography, I’m far more of a technician than I am creative. I may have a rough idea of what I want to accomplish, but until I actually get the model or client in front of the camera and we start shooting, the possibilities are virtually endless. I like shooting without a specific plan because it makes for an organic shoot – it starts as one thing and often gradually progresses into something entirely different.
Having said that, I’ve learned that when comes to figure shoots, it’s sometimes more productive for both me and the model to do a dry run, if possible, before the actual shoot – what I like to call a pre-shoot. For the pre-shoot, the model will be clothed, normally in something comfortable, but also something that will allow us to see the lines of her figure. Sometimes we’ll do the pre-shoot weeks in advance, sometimes it’s the front end of the “actual” shoot. Either way, it gives us both a chance to bounce ideas around and see what may work – and what definitely won’t – before getting down to business.
The key to this concept is shooting tethered: I shoot connected to a computer that’s placed for both of us to see – as we shoot – and we’re able to evaluate what we’re getting in real time. At first, if a model hasn’t worked with me before, it’s hard to keep her from glancing over at the monitor every other frame, but it becomes less of a problem as she gets a feel for the rhythm of the shoot. Typically, we’ll shoot a dozen frames, then stop and look at the images. We’ll talk about what’s working and what’s not, then adjust accordingly, whether it be the pose, the lighting, or both. Another dozen or so frames, then review. Often the changes are subtle, but when we’re able to compare images side-by-side, those small changes can make an obvious difference between something we just like and the definite keeper. If, as we review each segment, we see images that are particularly appealing, we’ll rate and color tag the photos for later comparison.
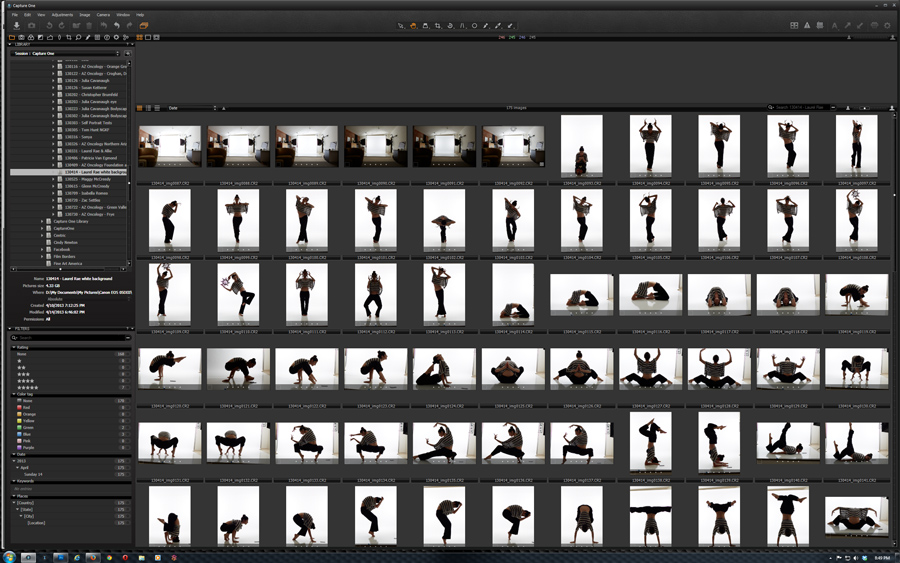
In the following image, we’re near the end of the shoot and we’ve selected four images that we think are likely candidates for the final photograph:

They’re all similar, but side-by-side, the second one from the left jumps out at me for the deep stance and there’s a certain tension about it that appeals to me. However, I prefer the torso and hand positions of the one to the far left. The other two appear more graceful, and the idea of opposing forces begins to take shape. We talk a bit about the idea, decide that we have all the shots we need for me to proceed to post-production, and call it a day.
 With as many shots as we took on this shoot and with as many possible keepers to choose from, I wanted to step away for several days before sitting down to begin editing. During that time, I thought about the opposing forces – grace and tension – and how I might take the best of the shots and combine them into one.
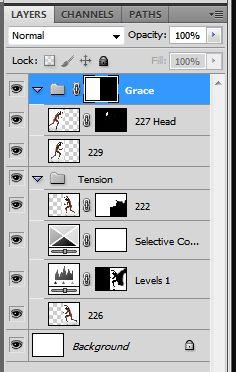
With an idea in mind, I went to work. For Tension, I took the deepest stance and combined it with the most suitable torso, taking the position of her shoulders, her arms, and her hands into consideration. Then I took a similar approach with Grace – a higher stance, softer facial features, and more graceful hand position. Using layers and layer masks in Photoshop, I ended up with the layer structure shown here.
It’s important to note here that shooting with a tripod is invaluable for a project like this, and makes editing so much easier than it would have been had I been shooting hand-held. Keeping the model at precisely the same distance and same angle of view from the camera from shot to shot means being able to combine shots with minimal effort. At the worst, I had to rotate pieces slightly to get them to align properly, but other than that the process was relatively simple due to my shooting method.
In the end, it took five separate photos to make up the final image – another hand from the fifth photo was needed to give Tension the finishing touch (her left hand, in the final image).

All of the images for this shoot were taken with the Canon EOS 5D Mark III camera and the EF 50mm f/1.4 lens at f/11, 1/125 s. Images were shot tethered and processed with Capture One, edited in Photoshop.


nice one